Complete guide to GA4 transition: setup and configuration
![]() Written by Jordan Katherine-Sharp
Written by Jordan Katherine-Sharp
6 min read - 1st May, 2023

Google Analytics 4 (GA4) offers some brilliant opportunities for tracking conversions in a new way. But how do you get started? Whether you want to transition your old UA properties or start with a brand new GA4 account, we’ve got you covered.
By the end of this article, you’ll know how to:
- set up a GA4 account
- transition your existing UA properties
- track your campaigns right away
- follow on from former UA campaigns or;
- start afresh with a new GA4 property.
We’ll cover off:
- How to set up a GA4 property
- Linking existing Google Analytics accounts
- Connecting BigQuery Warehouse
- Checking conversion tracking
- Setting up custom tracking using GTM
- Setting up custom tracking without GTM
1. How to set up a GA4 property
If you don't already have a Google Analytics property, you’ll need to create a new GA4 one for your site. If you want to update your existing UA property to a shiny new GA4 one, jump to 'Linking existing accounts'.
Here's how to set up a new GA4 property:
- Head to the Google Analytics homepage and click 'Start Measuring'.
- Fill in your company details.
- Click 'Show advanced options' and add your website URL.
- Then select GA4 property and click 'Next'.
- Fill in the 'About your Business' sections. This helps the machine learning and AI features of GA4 understand your business.
- Click 'Create'.
- Read through the Data Processing Terms and click 'I Accept'.
Now you have your first GA4 property.
Top tip: make a note of the Measurement ID in the top right corner, it’ll come in useful!
2. Linking existing Google Analytics accounts
If you have an existing UA property, you won’t want to lose your historical data. So, you’ll need to create a GA4 property to transition to before UA is sunsetted on 1st July 2023. First, check one hasn't already been created for you, and Google has been doing this automatically, but it will still need to be set up properly.
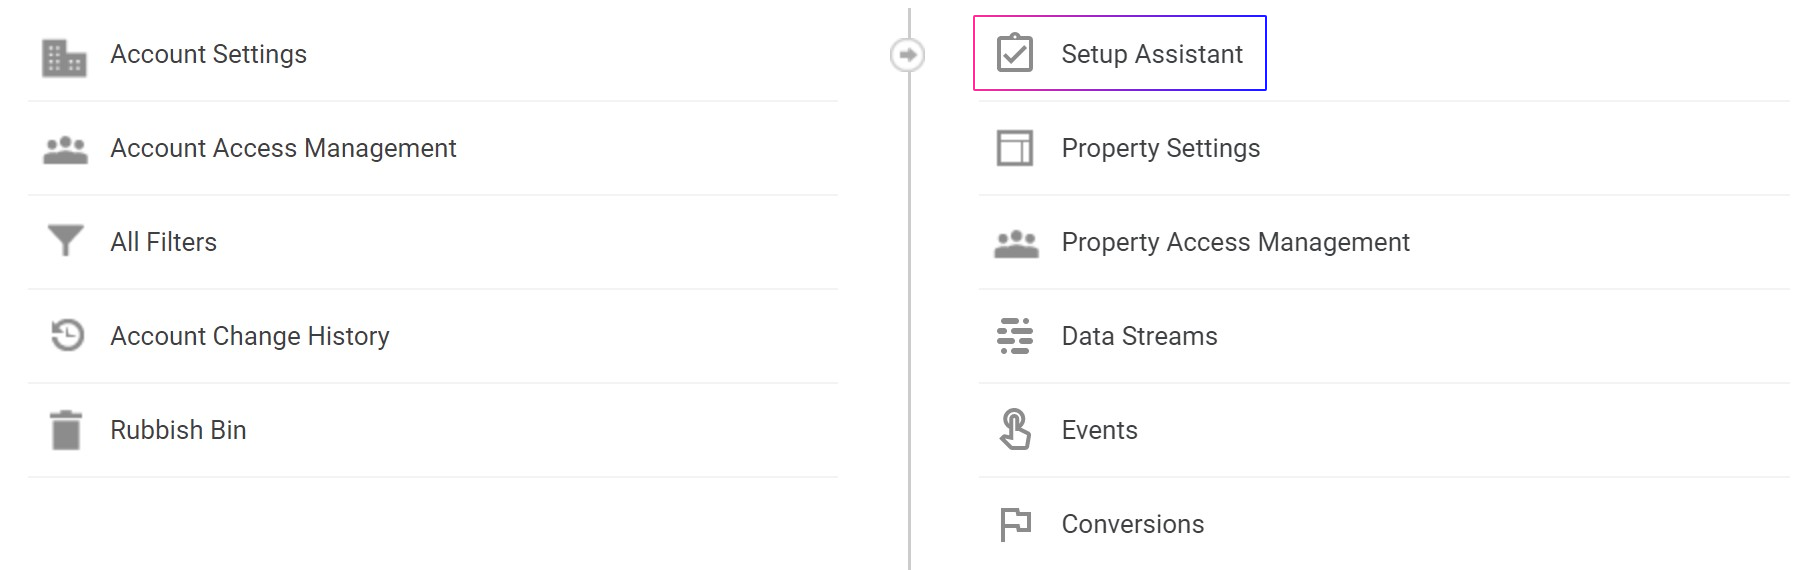
Google has created a GA4 Setup Assistant to help:
- In Google Analytics go to 'Admin'.
- Check you’re in the correct account and property.
- Click 'GA4 Setup Assistant' in the property column.
- Click 'Get Started' to begin.
- Click 'Create property' then 'See your GA4 property'.
- Find the > arrow under 'Tag Installation' and head to 'Data Streams'.
- This is where you can see your connected data in the new GA4 property (in most cases it's adding 'Web' but you can also select iOS and Android Apps).
- The Measurement ID for the GA4 property is in the top right corner.
You’ll now have your new GA4 property from your previous UA property.
3. Connecting BigQuery Warehouse
One of the new key features of GA4 is its free connection to BigQuery. It’s a huge set of data from the Google Cloud Platform. Google uses it to provide business intelligence via your reports and dashboards. It's great for serious data analysis champions, but not for the everyday user or business.
It uses data sourced from places like:
- Google Ads
- Google Analytics
- Facebook Ads
BigQuery Warehouse can help you:
- make more informed decisions for your campaigns.
- securely store your historical data - under 10GB is free.
To get started, integrate it with your new GA4 account:
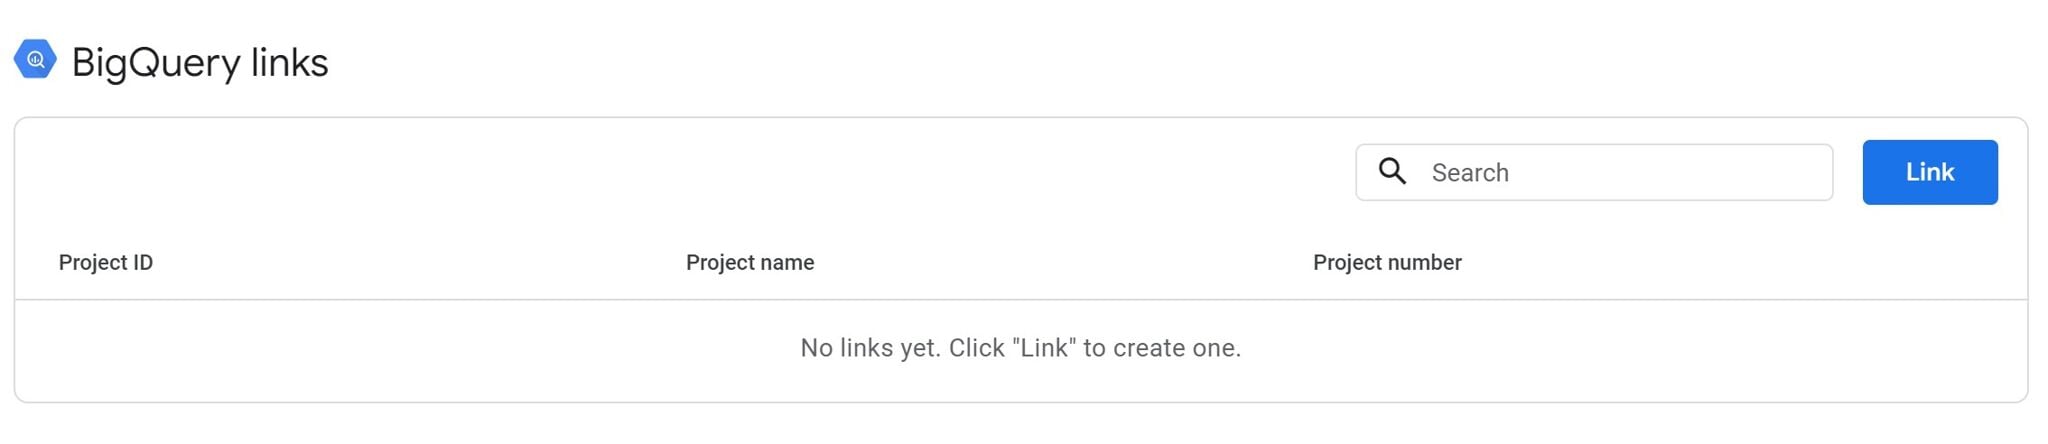
- Head to 'Setup Assistant' > 'Linking' > 'Link BigQuery'.
- Click 'Link'.
- Click on 'Choose a BigQuery Project' or do a manual search for your Project ID.
- Select your project and click 'Confirm'.
- Select your GA4 property name as the data location.
- Choose your data streams and frequency.
- Review and submit your data
Your Google account is now linked to BigQuery!
4. Checking conversion tracking
Tracking conversions in GA4 is a little different from UA. GA4 already tracks a lot of events, like ad clicks, scrolling, and file downloads.
Top tip: don’t miss out on any conversions. Cross-reference them in UA with what’s tracked in GA4
For any that aren’t being tracked you’ll need to manually set these up:
- Create an event for a confirmation page
- In Google Analytics go to 'Admin'.
- Make sure you’re in the correct account and property.
- Click 'Events' under the 'Property' column.
- Click 'Create event', then 'Create'.
- Enter a name for the event, e.g. 'generate_lead'.
- In the 'Matching conditions' section, enter the first matching condition as 'event_name equals page_view'.
- Click "Add condition" and enter the second matching condition as 'page_location equals https://www.example.com/contact-us-submitted'.
- In the 'Parameter configuration' section, click 'Add modification' twice and enter the parameter 'value' and value e.g. '100' in the first row, and the parameter 'currency' and value e.g. "USD" in the second row.
- Click 'Create'.
Now you have your first bespoke event created, it’s time to ensure it is tracked as a conversion.
Mark an event as a conversion
- In Google Analytics, click 'Admin'.
- Make sure you’re in the correct account and property.
- Click 'Conversions' under the 'Property' column.
- Click 'New conversion event' and enter the name of the new event, e.g. 'generate_lead'.
Your conversion is now attributed to this specific event.

Verify a conversion event
- Wait for a few minutes (it can be up to a few hours) for the configuration to apply to the event.
- Visit the confirmation page on your website.
- Go to the 'Conversions by Event name' card in the Realtime report.
- Look for the event name e.g. 'generate_lead' in the card.
- If you see the event in the card, then Analytics is treating the event as a conversion.
Now you are ready to create specific, bespoke conversion types for your campaigns.
5. Setting up custom tracking using GTM
GA4 has several automatically collected and enhanced measurement events. If you want to track any custom events, you’ll need to set them up either using Google Tag Manager (GTM) or manually.
GTM is a tag management system you can use to communicate between your site or app, your tracking code (tags), and your analytics system. GTM allows you to easily update the tracking code without having to edit it manually. Triggers can be set up in GTM to cause your tag to ‘fire’ when an event occurs.
GTM can support 2 GA4 tags:
- Google Analytics: GA4 Configuration.
- Google Analytics: GA4 Events.
Here’s how you set it up:
- Log in to your Google account and open GTM.
- Click on 'Add a new tag' under 'New Tag'.
- Click on 'Tag Configuration'.
- Select 'Google Analytics: GA4 Configuration' from the 'Choose Tag Type' window.
- Enter your GA4 'Measurement ID'.
- Click on the 'Triggering' option.
- Select 'All Pages' from the 'Choose a trigger' window.
- Rename the tag from 'Untitled Tag' to 'GA4 Configuration Tag' or whatever you’d prefer.
- Click 'Save'.
- Preview the changes by clicking on the 'Preview' button.
- Enter the URL of the website and click the 'Start' option.
- Check if the 'GA4 Configuration Tag' appears under 'Tags Fired'.
- Go back to the GTM tab and click 'Submit'.
- Edit the 'Version Name' and add a detailed description of the changes made in this version. This just helps you and anyone else accessing the account to keep track of any changes.
- Click on 'Publish'.
Top tip: adding a description to the tag helps you keep track of any changes.
More help on setting up GTM can be found on the Google support pages.
6. Setting up tracking without GTM
You have a few options for adding GA4 tracking code to your site without GTM:
- Connecting the Measurement ID to your existing UA property
- Add a “config” directive to the existing code on your site
- GA4 tracking code in the head section
Connecting the Measurement ID to your existing UA property
If you want to add GA4 Measurement ID to your website with an existing UA code, you must connect the GA4 Measurement ID.
- In Google Analytics go 'Admin'
- Click 'Data Streams' and select 'Web'.
- Copy the GA4 Measurement ID from the 'Web Stream Details' page.
- Go to your Universal Analytics property and click 'Admin'.
- Under 'Tracking Info', click 'Tracking Code'.
- Scroll down to 'Connected Site Tags' and click it.
- Paste the Measurement ID and create a new site tag.
- Click 'Connect' to link your Universal Analytics and GA4 properties.
Add a “config” directive to the existing code on your site
To add a GA4 Measurement ID to a site with a gtag.js analytics code present, you need to add a second config directive. This can be done in line 8 of the original gtag.js code, adding a new config directive with the GA4 Property ID.
GA4 tracking code in the head section
Analytics provides you with a GA4 tracking script that can be placed in the head section of every web page that you’d like to track.
Here’s where you can find it:
- Open Google Analytics.
- Click the 'Admin' option in the bottom left corner of the screen.
- Select 'Data Streams' and choose 'Web'. Then click on the arrow > under 'Data Stream' to go to the 'Web Stream Details' page.
- On the 'Web Stream Details' page, go to the 'Tagging Instructions' tab and find 'Add New On-Page Tag'. Here you will see the 'Global Site Tag'.
- Copy that tag and get pasting!
Summary of transitioning to GA4
As you can see, there are several options available to you for setting up GA4 for your accounts. We hope this guide has made the steps involved clearer.
As specialists in Search, with our account managers working in GA4, we’re well-versed in setting it up and getting the most out of it. If you need any more help, please get in touch. Tracking your new GA4 accounts is only the beginning.


